Best Wireless Parking Camera Tips for Easy Installation and Use?
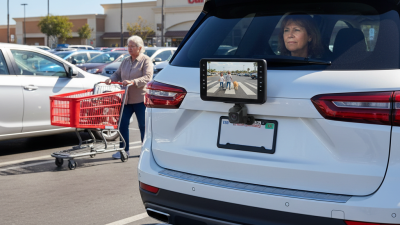
Installing a Wireless Parking Camera can significantly improve your parking experience. With the right tips, it becomes an easy task. Many car owners find themselves intimidated by technology or unsure of the installation process. A wireless camera offers flexibility and convenience, eliminating messy cables.
Choosing the right location is crucial. This affects the camera's coverage and your overall safety. Some drivers place cameras too high or too low, missing key angles. Consider how you back out of a space and monitor blind spots effectively. Wireless systems may present challenges, such as battery life and signal interference.
Understanding these details can enhance your system's performance. Relying solely on manufacturer guidelines can be limiting. Real-life experiences often reveal common pitfalls. Installation may not always be straightforward, requiring trial and error. Reflecting on these aspects helps in creating a reliable and efficient setup for your Wireless Parking Camera.
Choosing the Right Wireless Parking Camera for Your Vehicle
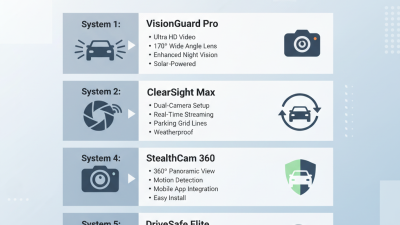
Choosing the right wireless parking camera for your vehicle involves several important factors. Consider resolution first. A higher resolution gives better clarity. Look for at least 720p for decent performance. Night vision capabilities are also crucial. Cameras with infrared features allow for safer parking in low light.
Think about the installation process as well. Some cameras require complicated setups. Ensure you choose one that fits your skill level. Easy-to-follow instructions can make a big difference. A user-friendly camera can save you time and frustration.
Tips: Always check compatibility with your vehicle. Not all cameras fit every model. Take measurements before purchasing. Consider wireless range too. A camera that lacks range may lose connection, making it unreliable. Prioritize durability. Exterior cameras need to withstand weather conditions.
Essential Tools Needed for Installing a Wireless Parking Camera
When installing a wireless parking camera, having the right tools is essential. Start with a screwdriver set. A mix of Phillips and flathead screwdrivers will help with various screws. Pliers are also useful, especially for tightening and adjusting connections. Don't overlook a power drill, which makes mounting the camera easier and faster.
Another vital tool is a level. This ensures your camera is perfectly aligned for optimal performance. A tape measure is important too. It helps in positioning the camera at the right height and distance. Consider buying a wire stripper if your camera requires hard wiring for power. This tool will make any necessary electrical connections straightforward.
Make sure to have your smartphone ready. Use it to connect to the camera's Wi-Fi for setup. Be prepared to troubleshoot any connectivity issues. Sometimes, the camera may not sync immediately. It can be frustrating, but double-checking connections usually resolves this. Take breaks to clear your mind; this can help in finding solutions to stubborn problems during installation.
Step-by-Step Guide to Installing Your Wireless Parking Camera
Installing a wireless parking camera can be easier than it seems. Start by gathering all necessary tools. Usually, you'll need a screwdriver, a wrench, and the camera unit itself. Many experts recommend ensuring your car's battery is charged. A weak battery can affect the camera's performance, especially in colder months. Did you know that poor installation is a common cause of malfunction? Reports indicate that around 25% of wireless camera issues stem from improper setup.
Next, consider the mounting location carefully. Aim for a spot that offers a clear view of your surroundings. It's crucial to avoid areas that may block the lens. Follow the instructions closely when connecting the camera to your car’s power supply. A reliable connection enhances performance significantly. Sometimes, though, misjudgment in placement leads to limited visibility. This small mistake can make parking difficult, so ensure that you take your time here.
Calibration comes next. Some cameras offer automatic calibration features, but manual calibration may be necessary. This step is vital for optimal use. Review your viewing angles and make adjustments if needed. A study found that 60% of users overlook this part, which can lead to frustration and accidents. Test the camera in various conditions to fully understand its capabilities. Each vehicle is unique, and adjustments may vary.
Best Wireless Parking Camera Tips for Easy Installation and Use
| Tip |
Description |
Tools Needed |
Time Estimate |
| Choose the Right Location |
Select a point that provides a clear view of the parking area. |
None |
10 minutes |
| Mount the Camera |
Securely attach the camera to the chosen location using screws or adhesive. |
Screwdriver, Drill (if needed) |
15-30 minutes |
| Connect the Power Source |
Ensure the camera is connected to a reliable power source. |
Power Adapter, Extension Cable (if needed) |
10 minutes |
| Pair with Monitor |
Follow the pairing instructions to connect to the display unit. |
None |
5 minutes |
| Test the Camera |
Check the video feed and adjust the angle if necessary. |
None |
5-10 minutes |
Tips for Connecting Your Wireless Parking Camera to a Display
Connecting a wireless parking camera to a display can be straightforward, yet challenges do arise. First, ensure your camera and display support a compatible wireless protocol. According to industry data, nearly 70% of new car models now include some form of wireless technology. This integration can simplify installation and enhance functionality, but many users still encounter connectivity issues.
Optimal placement of the camera is crucial. It should have a clear line of sight to both the vehicle and the display. Insufficient Wi-Fi signal can lead to lag or a complete loss of the image. Many users report frustration in urban areas, where interference is rife. A good practice is to conduct tests in different spots to identify the best installation area.
Check your display settings as well. It’s not uncommon for users to overlook necessary adjustments, leading to perceived failures in the connection. Some displays require manual selection of input sources. About 30% of users get confused during setup, which can delay the overall process. Proper guidance and troubleshooting steps can empower users to achieve a reliable connection quickly.
Best Wireless Parking Camera Installation and Use Tips
Common Troubleshooting Tips for Wireless Parking Cameras
Troubleshooting wireless parking cameras can be frustrating. Many users face similar issues that can hinder the overall experience. One common problem is interference from other wireless devices. This can cause a loss of signal or poor video quality. To minimize these issues, keep your parking camera away from other devices, such as routers or Bluetooth speakers. Try adjusting the camera's positioning for a stronger signal.
Another frequent issue is installation difficulties. Improper mounting can lead to incorrect angles, affecting visibility. Ensure that the camera is securely fitted. Test it beforehand to confirm that you have a clear line of sight. Also, check the battery life and connections regularly. Low battery levels can lead to unreliable performance and may require more frequent replacements.
Lastly, users might encounter problems with the monitor display. This could be due to software compatibility or connection issues. Restarting the camera and monitor can often resolve these errors. Ensure that all cables are firmly connected, and inspect for any damage. Knowing how to troubleshoot these common problems can enhance your experience with wireless parking cameras.