7 Tips for Choosing an RV Backup Camera Monitor?
An RV backup camera monitor can make reversing less stressful, but the right setup depends on your vehicle, trailer, and driving habits. A narrow driveway, a long trailer, or a bright afternoon glare can expose weaknesses that a product photo will not show. The best choice is not always the largest screen. It is the one that gives you a clear, dependable view when you need it.
The stakes are real. The U.S. National Highway Traffic Safety Administration estimated that rear-visibility requirements could prevent 58 to 69 deaths and 8,000 to 9,900 injuries each year. That finding concerns rear visibility broadly, not RV monitors alone, but it highlights why camera coverage and image reliability matter. The RV Industry Association also reported 333,733 wholesale RV shipments in 2024, reflecting a large and active RV market. More RVs on the road mean more drivers must judge blind spots, hitch alignment, and obstacles behind long vehicles.
This guide examines seven practical factors, including screen size, signal stability, night vision, camera placement, and installation. RV educator Mark Polk is a relevant professional reference, but no verifiable, attributable quotation from him was supplied for this introduction. I won’t invent one. A camera helps; it does not replace mirrors, careful checks, or a spotter when visibility is limited.
Identify Your RV’s Camera and Monitor Requirements
Before choosing an RV backup camera monitor, identify the system already installed. Check the camera’s connector, power supply, and signal type. A wired camera may not work with a wireless-only monitor, even if the plugs look similar. Read the manuals or photograph the connection points before ordering.
Count the camera views you need. One rear camera may be enough for a compact trailer, while a long motorhome may benefit from side views. Confirm how many video inputs the monitor supports and whether it can display several feeds at once. That matters. Note the camera’s resolution and night-vision performance, too; a bright screen cannot restore detail the camera never captured.
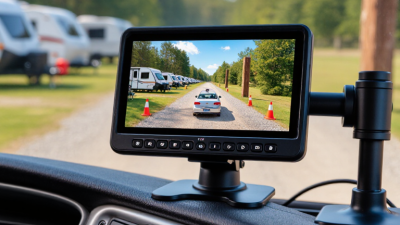
Think about where the monitor will sit and how you will power it. Measure the dashboard space, check the cable route, and make sure the screen stays visible without blocking mirrors or controls. Measure twice. Screen size is only part of the decision: glare, viewing angle, and button placement affect daily use. Wireless signals can also become unreliable around metal walls or at greater distances, so check the system’s stated range against your vehicle. Specifications help, but they do not always predict real-world performance. A little uncertainty is normal; leave room to verify fit and compatibility before committing.
Check Screen Size, Resolution, and Viewing Angle
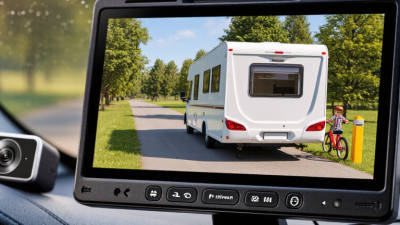
A larger monitor can make a hitch, curb, or child-sized obstacle easier to spot, but size alone is not a safety feature. For many RVs, a 7- to 10-inch screen offers a practical balance between visibility and dashboard space. Check the diagonal measurement and where the screen will sit; a large display mounted low can still pull your eyes far from the road. Glare matters. Look at it in daylight, not only in a dim showroom.
Resolution should match the camera’s output. A high-resolution screen cannot restore detail the camera never captured, so check both specifications and inspect a real image for blur around edges and license plates. Viewing angle matters too: compare the stated horizontal and vertical angles, then view the screen from your normal driving position. A picture that washes out when you lean slightly can be frustrating. I still find this easy to overlook.
For a useful reference point, NHTSA’s Federal Motor Vehicle Safety Standard No. 111 sets a rear-visibility benchmark: the image must show a zone 10 feet wide and 20 feet behind the vehicle, and appear within two seconds of activation. This is not a universal RV-monitor specification, but it highlights why coverage and quick image display matter. Test the monitor while parked, with the RV attached and in its usual seating position. A neat spec sheet can mislead. Check the actual view.
Compare Signal Type, Range, and Camera Compatibility
Choosing an RV backup monitor starts with the signal path. Wired systems avoid radio dropouts but need a cable routed through the vehicle. Wireless systems install more easily, yet walls, metal panels, and nearby electronics can weaken reception. In its 2014 rear-visibility rule analysis, the National Highway Traffic Safety Administration estimated that rearview systems could prevent 58 to 69 deaths and 15,000 injuries annually. Those estimates concern regulated vehicles, not a guarantee of RV camera performance. Still, they underline why a steady, usable image matters.
Tips: Check whether the camera sends an analog or digital signal, then confirm the monitor accepts that format. Ask whether the listed range assumes a clear, open path; an RV’s body can change real-world reception. Match the camera’s resolution, connector, voltage, and image orientation to the monitor. Test the setup with the engine running and the trailer connected. Small details matter.
A bright afternoon view may look crisp, then turn muddy at dusk. Compare screen brightness and night performance, not just screen size. If possible, test the image from the driver’s seat, with the camera mounted where it will actually sit. Specifications help, but installation quality can undo a promising range figure. I would leave room for that uncertainty.
Assess Installation Needs and Weather Resistance
Before choosing a monitor, map the cable route from the rear camera to the cab or dashboard. Measure the distance, note tight bends, and check whether the cable must pass through a wall or ceiling. A wireless setup may simplify routing, but metal walls and other electronics can weaken its signal. NHTSA’s rear-visibility rule for covered vehicles uses a 10-by-20-foot area behind the vehicle and a display available within two seconds. Use that as a visibility benchmark, not a universal RV requirement.
Separate the monitor’s needs from the camera’s. The screen usually sits inside; the camera faces rain, road spray, dust, and vibration. Check the ingress-protection rating for each component. Under IEC 60529, IP67 indicates dust-tight protection and resistance to temporary immersion in up to one meter of water for 30 minutes. That rating does not prove resistance to years of sun exposure or a loose connector. Details matter.
NOAA recorded 28 U.S. weather and climate disasters costing at least $1 billion each in 2023. That figure is not an RV equipment test, but it underlines how demanding outdoor conditions can be. Look for sealed connectors, strain relief, and a mount that will not wobble on rough pavement. Then test the view in daylight and darkness. A neat installation can still leave a blind spot. Recheck it after the first trip; cable routing is easy to underestimate.
Balance Safety Features, Ease of Use, and Cost
An RV backup monitor should reduce uncertainty, not add another puzzle. Choose a screen you can read in daylight, even when sunlight falls across the dashboard. Check that the camera provides a wide view and usable low-light images. Guidelines can help estimate distance, but they may not match your RV’s exact dimensions. Test them in a safe, open area.
Consider how the system fits your routine. A monitor that turns on automatically when you shift into reverse is easier to use than one requiring extra steps. Wireless models can simplify installation, though signal quality may vary with distance and obstructions. Wired systems often need more setup. Keep the camera lens easy to reach for cleaning, especially after dusty roads or rain. Small detail. Big difference.
Spend for features you will actually use. A larger screen, multiple camera inputs, or better night visibility may be worthwhile if you drive a long RV often. A basic display may suit occasional trips. Compare the full setup cost, including cables, mounting parts, and installation. I would not rely on a camera alone; mirrors and a spotter still matter in tight campsites. It is tempting to buy the most feature-packed option, but extra menus can distract. Check the controls before buying, and imagine using them while parked in bright sun.